If you are creating a room for the first time, please choose "New room" (Neuer Raum) within the infobox.
If there are already existing meeting rooms, please click  for creating a new room.
A new window appears where you need to choose the basic settings. In addition, you can adjust further settings.
Basic settings
To create a room, you need to name it. The room will be listed in the course with this name. Additionally, you can decide whether other participants have administration rights (Alle Teilnehmenden haben Moderationsrechte) or not. Ticking this option enables all participants to change the name of the room, start recordings, disable rights of other participants, etc. All participants will have the same rights as the initiators.
Further settings
- Mute participants when they enter the room (Alle Teilnehmenden initial stumm schalten): Tick this, if you would like your participants to be muted when joining this meeting. Everyone can unmute themselves afterwards manually.
- Webcams only seen by moderators (Nur Moderatoren können Webcams sehen): Docents and tutors only can see the shared webcams of the students.
- Webcam for moderators only (Nur Moderatoren können Webcams teilen): Docents and tutors only can use a webcam, participants are not allowed to use a webcam.
- Audio for moderators only (Nur Moderatoren können Audio teilen): Docents and tutors only can use a mic, participants are not allowed to use a mic.
- Deactivate collaborative notes (Gemeinsame Notizen deaktivieren): This option removes the possibility for writing notes all together in real time.
- Deactivate private chats (Private Chats deaktivieren): Thereby, no one can send direct messages to anyone, there will be only a group chat for all people in this room.
- Capacity of participants (Maximale Teilnehmerzahl): You can decide, how many people are allowed to be in the room at the same time.
- Duration of the conference (Minuten Konferenzdauer): Here you can enter, how long a conference will take place. After that time, the room will be closed automatically. The default value is 240 minutes.
- Joining of guests (Zugang via Link): If people who are not within the Stud.IP platform should be able to access your meeting, you need to activate this option. You can decide, wheter no guest are allowed (Nicht gestattet), moderators need to accept guests (Moderator vor dem Zutritt fragen) and guests can join freely (Gestattet).
- Recording (Sitzungen können aufgezeichnet werden.): You need to activate this option, if you would like to record your meetings. Moderators still need to start the recording manually.
- Make recordings visible for participants(Aufzeichnungen für Teilnehmende sichtbar schalten): If you would like to make your recordings available for the participants, you need to activate this option.
After you have set all options as you like you can now finally create the room by clicking  . When the room was created successfully, a system notification will appear.
The room appears within the "Meetings" tab of your course.
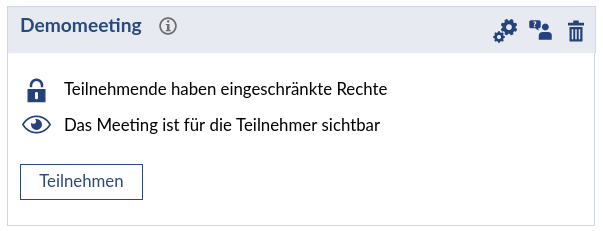
A meeting room needs to be visible to be accessible for the participants of your course. The visibility can be changed by clicking  . The actual state is shown next to it. If a meeting is invisible, the symbol changes to
  .
.
By clicking  you can change the rights of the participants in this meeting room. By default, participants have limited rights. Otherwise, the participants will have equal rights as the initiator and the symbol changes to
  . We recommend to keep this setting on default, especially in big groups! If you would like to give someone the same rights as an initiator has, you can promote this person directly within the conference room.
You can always change the settings by clicking  .
.
To delete a meeting room, just click  .
.

 for creating a new room.
 . When the room was created successfully, a system notification will appear.


 . The actual state is shown next to it. If a meeting is invisible, the symbol changes to
  .
.
 you can change the rights of the participants in this meeting room. By default, participants have limited rights. Otherwise, the participants will have equal rights as the initiator and the symbol changes to
  . We recommend to keep this setting on default, especially in big groups! If you would like to give someone the same rights as an initiator has, you can promote this person directly within the conference room.
 .
.
 .
.