Dokumentations-Portal
- Anwenderhilfe
- Administrationsdokumentation
- Entwicklerdokumentation
In this section you learn how you set up functions and groups and assign people to them.
The purpose of groups
In many situations it can be helpful to arrange the participants of a course or of an institution according to functions or groups. In a course this could be the following:
Division of the students according to the type of credit obtained (no credit, Certificate of attendance, credit). You then see at a glance which students must perform well…
Division of the students according to areas of competence. In a practical course, for example, teamwork should be promoted; to achieve this, the course is divided into “designers” and “programmers”.
The course’s homework assignments are written in groups. You can administer these simply as such and stay on top of things…
Classifications are nearly indispensible for every institution.
Creating Functions / Groups
When no functions or groups have been created in an area, you see only the first of three areas on the page:

With this line you can create a new function or group. In the Templates field you find a number of group names which are appropriate for your area (institute, teaching course, research project, etc.). In order to adopt one of them, click on the yellow double arrow  to the right of it.
The desired group name now appears in the field to the right of it. You can change then name in any arbitrary manner or initially use one of your own without reverting to the templates.
You can set the target size of a group with the “Group size” field. This number can be subsequently useful in order to be able to tell at a glance whether a group in an official committee is not adequately staffed (Example: the university teacher group in the Faculty Council must comprise at least 4 people). If you do not need it, simply leave the field blank.
In a course you can stipulate the maximum group size with this field. You yourself can assign an arbitrary number of participants to the group. When the name and possibly the number have been set correctly, click on the yellow arrows to accept it.
Assigning people
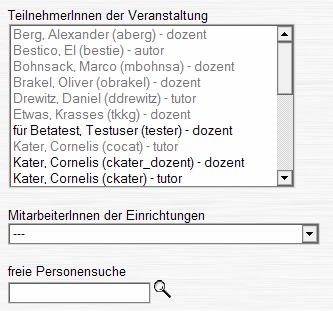
You now see the other two areas on this page, the Person area
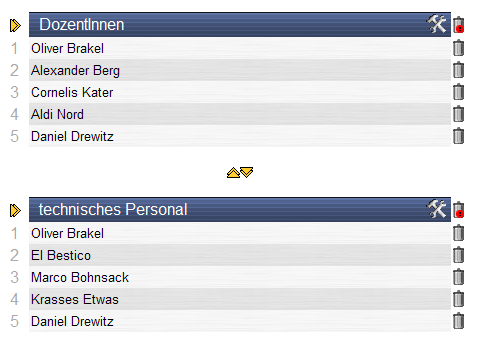
and the Group area
The Person area is used to find the users before one assigns them to the groups. The following can be selected: all participants of the course, all members of the participating organizations, as well as an unrestricted search across all users of the system. Mark the users whom you desire to assign to a group with the mouse. If a user has already been assigned to a group, he or she appears grey. This facilitates the complete assignment of all the people to at least one group. However you can also assign the person to other groups (example: student assistant AND women's representative).
Assign the marked users to one of the established groups by clicking on the yellow double arrow just to the left of the appropriate group header. The person now appears in the group. You can rescind the assignment using the Waste bin on the right side. Naturally, the person still remains a participant in the course.
With the red-highlighted Waste bin you can delete an entire group with all of its person assignments.
With the yellow arrows between the various groups you can change the sequence of the groups. The groups then appear with the assigned sequence throughout the system.
With the Edit icon at the right in the Group header you can subsequently change the name and size of a group. To achieve this, the current data are loaded into the upper part of the page and can be changed there. The group to be changed becomes red.
 Experiment with the possibilities of this page as much as you wish. You absolutely cannot damage anything, all of the steps can be reversed. Once one has understood the principle, it is easy to achieve the desired results.
 However, please consider the following: If you assign people from OUTSIDE your course or your area to a group, they are automatically registered for the course or institution. Naturally, you can also reverse this step on the appropriate administration pages (Delete the course participant / Delete the institution staff member).