Dokumentations-Portal
- Anwenderhilfe
- Administrationsdokumentation
- Entwicklerdokumentation
In this guide you will learn how to manage participants in your course. Additionally we will show which permissions are available for different account types (lecturer, tutor, author) in a course. Firstly you will see a list of all participants in your course.
Attach:participantsoverview.jpg Δ
The following table shows an overview of all user groups and their permissions.
Participants can also be added manually to a course by a lecturer of the respective course. You can add lecturers, tutors as well as authors. Please note that all users can be added as authors, but only those that have a global Stud.IP status as lecturer or tutor can be added as lecturers or tutors to the course. A user that’s only ‘author’ cannot be added as a tutor to the course, but needs to be upgraded globally first by an administrator. However, you can add users that have the global status ‘tutor’ as authors to the course. Adding users works the same way in every user group. Use the actionsbox on the right side and select the user type you would like to add.
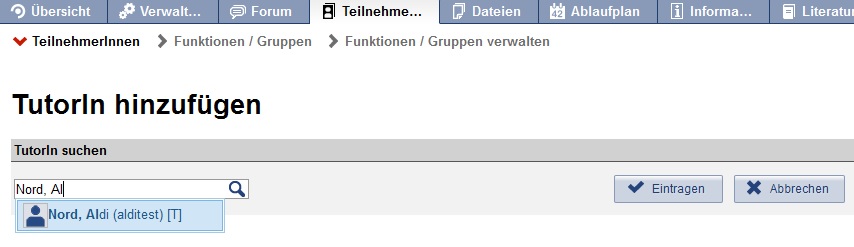
A new page with a search field will open. In the field you can enter the first- and last name or the Stud.IP user name and by clicking on the enroll button Attach:enrolbutton.jpg Δ the user will be added as a lecturer/tutor/author to the course.
Moreover it is possible to add a list several users as participants to a course. Simply enter the information of the users into the field “Accept list of participants”. It’s possible that you have to expand this field first in order to see it.
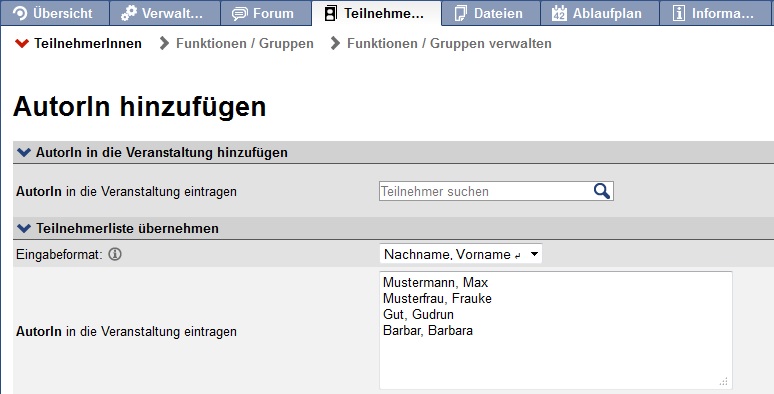
Here you can choose between two different input formats:
Always enter just one „Lastname, firstname“ or „username“ per line. By clicking on the enrol-button Attach:enrolbutton.jpg Δ participants are added to the course.
There is an option for exporting a list of participants of the course via the export function on the action box on the right-hand side.

The list can be exported either as an rtf-document or as a csv-document.
While entering new users you have the possibility to add them directly as tutors if the user is already a 'tutor' within the Stud.IP system. However, it is also possible to add them as an author first and appoint them as a tutor later or vice versa downgrade a tutor to an author (or author to reader – a user without writing permission). In order to appoint or downgrade a user tick the box left of the user in the list. Afterwards you select the action (appoint/downgrade – or “hochstufen/herunterstufen”) from the dropdown box and click on “Execute”.
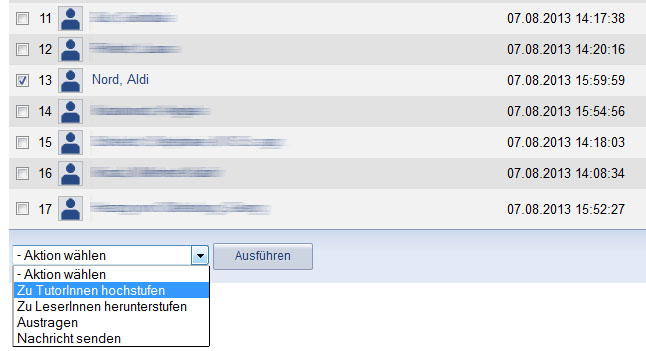
This way you can also remove several users at once from the course. If you want to remove single users you can also use the door symbol on the right-hand side next to the user’s name.
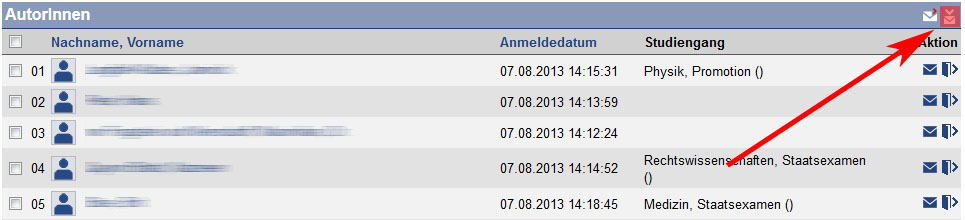
As a lecturer you have the option to either send a message to all participants of the course by clicking on Attach:Massmail1.jpg Δ (message to all users) in the action box on the right or separatly to the respective user groups (lecturers, tutors, authors, reader). In this case, click on the little envelope icon with the white arrow on top right next to the respective user group.
More about internal system messages can be found here.
________________
If the course has been restricted to a certain number of participants you will see an additional table below – the registration or waiting list. In these lists you can see all users that would like to enroll to the course, but haven’t yet been drawn by lots or couldn’t be added to the course anymore because the max. number of participants based on the quota was full already. As a lecturer you can add users from these lists any time if you like to. Just select the student by ticking the box left of them and select “Zu NutzerInnen hochstufen” (add as participant) at the bottom of the dropdown menu. This way you can bypass the restriction of the course – please note that if you add users manually the max. number of participants will be larger than the initial set-up!
Attach:Warteliste1.jpg Δ On the registration and waiting list – as well as on the normal participant list – you can see the course of study of the user. This is important if you would like to see during the first session of the course if all the attending students did get into the course and what course of study they belong to. Simply print out the participant list via the print function of your browser.
