Lecturers manual
The following manual considers that you have the dozent rights and have access to at least a course of your own that you could add plugins into. Besides it is necessary that you are familier with basics of Stud.IP's terminalogy and functionalities as a lecturer.
Please be advised that throughout this user manual you may see some abbriviations such as:
- VC: Video Conference
- BBB: BigBlueButton
...
Also the word "room" or "meeting" refers to the item created here in this plugin which at end represents the actual VC room on the server.
Add Meeting Plugin
Every course has some pre-defined core functionalities (core plugins), however some other plugins must be added to a course by the lecturers manually and it is done via the following steps:
Step 1:
In the top course navigation bar, you should find and navigate a link button named More ...

Step 2:
In the list of functions, you should find and check the Meetings

Step 3:
After the Meetings is added to a course, you should be able to see its navigation item added to the course navigation bar and be able to navigate to it.

Add New VC Room
First thing after you add Meetings function into a course is to create a new VC (Video Conference) room. This could be achieved via the sidebar action item Add room

Clicking on that link result in opening a dialog called Room configuration
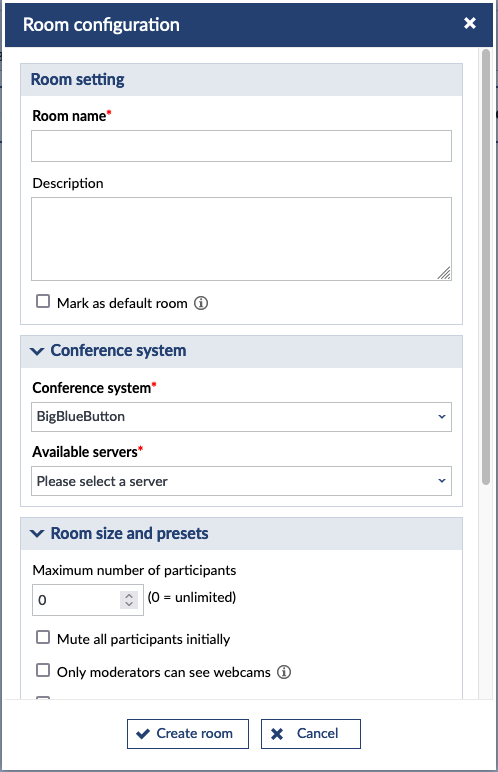
Room Configuration
Please go to the described room configuration for more information.
Room Block (Item)
In this plugin each created room will be displayed as a block or item (or even refered to as room component) in the room list.
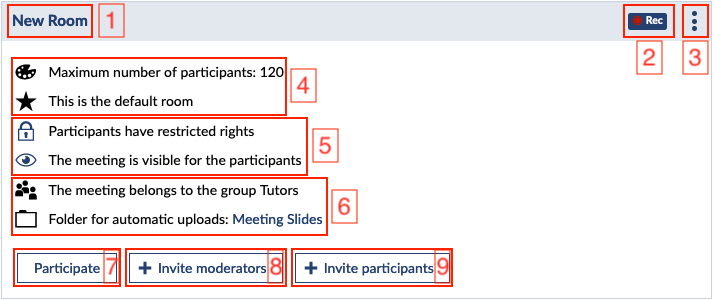
- The name of the room item.
- The recording badge to illustrate that a room is being recorded. By hovering the mause over this badge more information will be shown. It is desigend to catch users attentions.
- Action menu: this is the Stud.IP standard way of providing action menu for items and it contains the following:
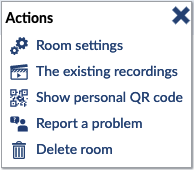
- Room settings: this action item is to edit room settings, which similar to add room opens the room configuration dialog. refer to the described room configuration for more info.
- The existing recordings: this action item open a new dialog containing the current room recordings to playback and manage.
- Show personal QR code: this action item will open a dialog to show QR Code management, the purpose of this is to give the users the advantage of joining a session with a second device.
- Report a problem: this action item will open a dialog to report a problem.
- Delete room: with this action you could delete the room item (confirmation is needed).
- This area is for basic informations as shown in the image.
- This area is for quick access buttons:
- Click on (lock icon) will toggle the participant rights.
- Click on (eye icon) will toggle the visiblity of the room for the users.
- This area contains the additional information about the room including group, linked folder and other notifications.
- Participate button: with this button one could join to a VC meeting session, this will redirect users to a new page.
- Invite moderators button will open a dialog to manage moderators invitation.
- Invite participants button willl open a dialog to manage guests invitation.
Page costomization
This part of the plugin is to manage the anything other than meeting rooms such as Navigation item name and introductory texts.
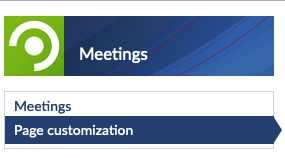
It contains two views including Settings and Introductory text
This can be accessed in the sidebar navigation item.
Settings
This view contains the general plugin setting.

- Tool name: this is the name of the tool/tab in the course navigation bar, changing this will result in having a new name for the plugin.
Introductory texts (Introduction)
In this part of the plugin you are able to manage Introductory texts of the plugin.
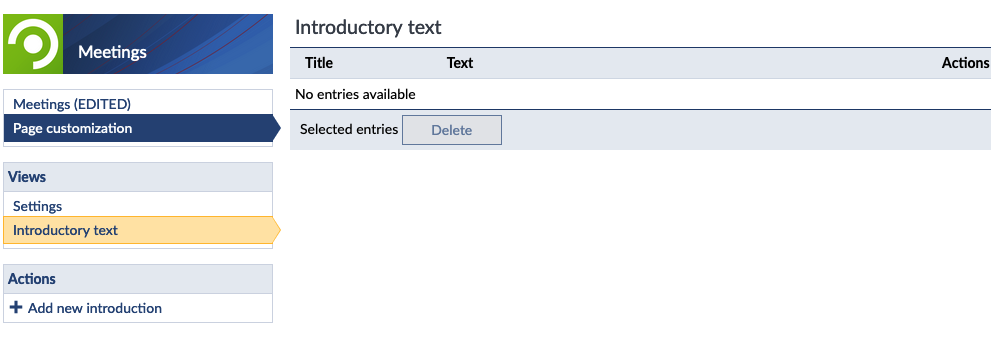
Add new introduction
The Add new introduction link item in the sidebar action, will help you adding new one. This link will open a new dialog shown below:
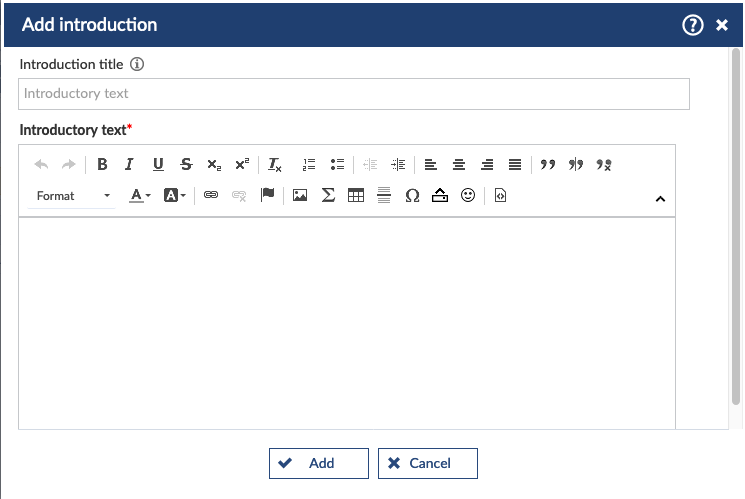
- Introduction title: this is the title of the introduction. If empty, deafult title (Introductory text) will be used.
- Introductory text: this is the text of the introduction that can contain rich (HTML) text with formats etc. (Required)
Introductions list
All available introductory texts will be shown in the table list and you are able to manage the list items including bulk delete, single delete and edit the current item.

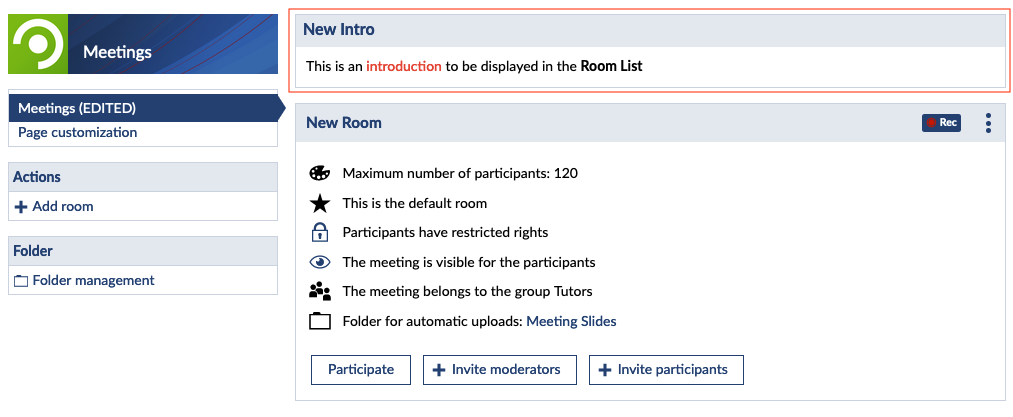
See the introductions in action
After adding any number of introductions above, they will be displayed in the room list and sit on the top of the list like:
Folder management
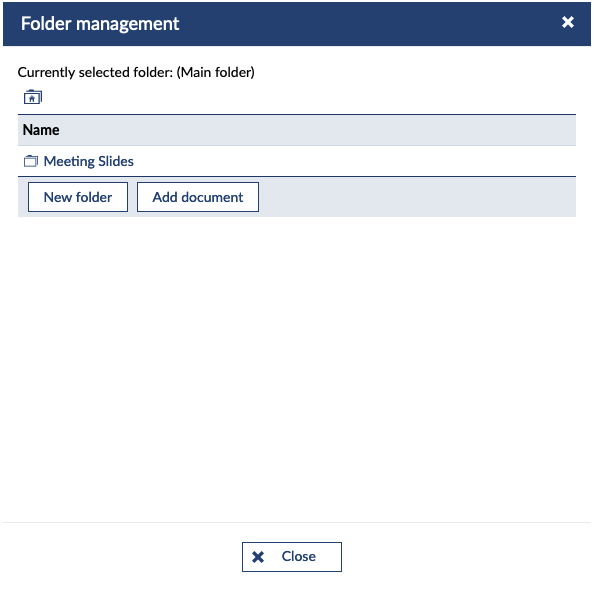
This a new part of the plugin introduced in v2.80 and it is intended to provide a minimal course files feature with which you could manage the file system including the folder listing, add folder and add documents.
On the sidebar you will have a new vwidget called Folder containing Folder management link.
NOTE: the mechanism is to select a folder as the currently selected one by clicking of the folder item in the list. Files cannot be slected, but only shown.

By clicking on that link the file management dialog opens.
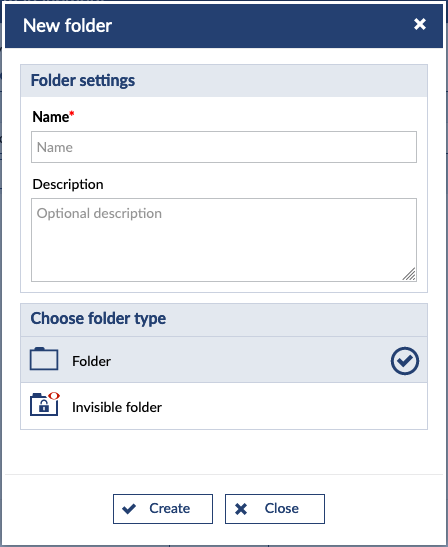
New folder
With New folder button which opens another dialog, you could add new folder to currently selected folder in the main dialog.
- Button

- Dialog
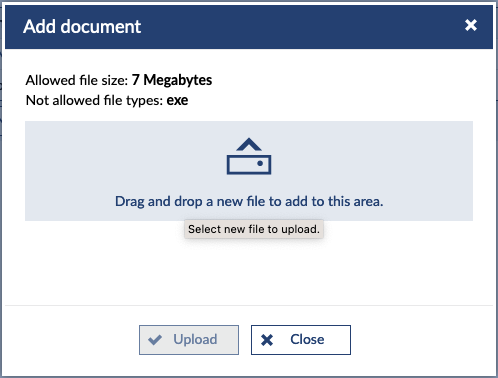
Add document
With Add document button which also opens a dialog, you could add single document to the currently selected folder in the main dialog.
NOTE: upload can be done via drag and drop as well as file selection simple by clicking on the upload area!
- Button

- Dialog
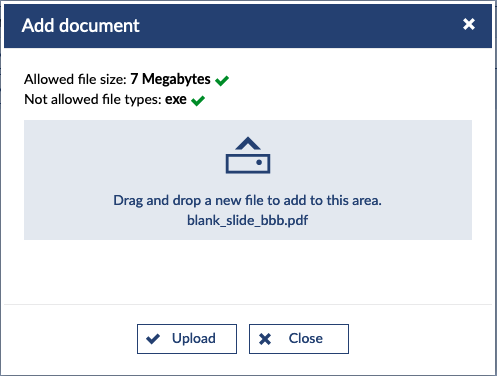
Correct Upload
When an upload meets the requirements stated such as file size and file type, then green ticks appear to indicate the validity and the upload button will become enabled.
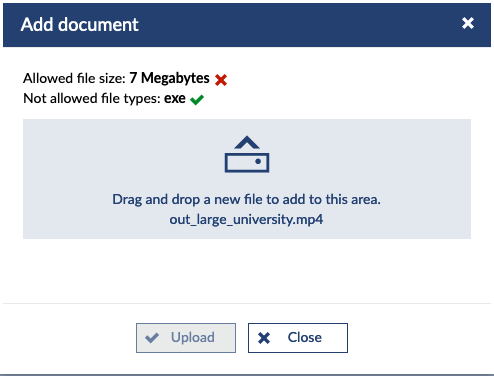
Incorrect upload
If a file could not meet the requirements,, then red exclanation icons appear indicating the invalidity and upload button remains disabled.
Meetings Widget
It is possible to set a widget of this plugin in Stud.IP start page which helps user to have access to currently running meetings as well as upcoming ones for the day. Users are able to join the meeting directly from the widget or access the meeting's course page first. For more info refer to Widget feature.
