Administrators manual
The following manual considers that you have the admin/root rights and have access to the Admin > System > Plugins in your Stud.IP instance. Beside that, you need to be familiar with the Admin settings and how everything works there!
Installation
Always install the latest available version from Stud.IP Plugin Marketplace.
For features requests or report any bug or problem, please refer to Meeting Plugin GitHub repository
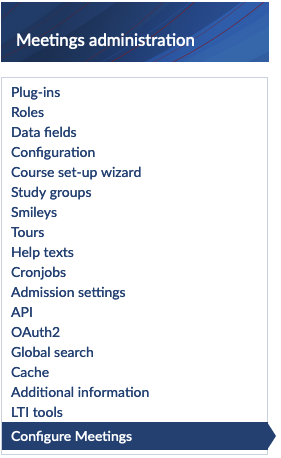
Upon a successful installation and activation of the plugin, a new navigation item called "Configure Meetings" is added to the sidebar list.

Meeting Configuration
In this page you are able to manage the general settings as well as driver specific settings.
General configuration
This section included those settings that do not depend on the drivers and are used throughout the plugin.

- Feedback support address: This option provides an extra email for the feedback features (Report Problem) to send to other than global support email set in Stud.IP settings.
- Feedback senders address: Default mail results in sending the feedback (Report Problem) with an anonymous (system) sender email User mail on the other hand sends that feedback email but with the user email.
- Do participants have to agree to the privacy text, before joining a meeting with recording feature?: This provides the feature to show an extra Privacy confirmation to the users when a meeting is being recorded.
- Use Stud.IP for default slides: As the name suggests, this option is to choose whether Meetings Default Slides mechanism (Stud.IP) should be responsible for the default slides in meetings mostly BBB or the server itself.
NOTE: To Manage Default Slides, admin must switch to its view by selecting it in the sidebar and continue with managing them there.
Drivers
Drivers are referred to as the online video conferences systems to be used.
In each driver you would see 2 options that are similar namely: Allow this driver to be used (to activate/deactivate the driver) and Display name (the name to be displayed to users)
Each driver can have multiple servers to offer different variations. There is a server table list in each driver section, that provides basic info about that server and a few actions such as edit, presets and delete.
- To add new server to a driver one must use Add server button.
- To edit each server, one must click on the (edit icon) in the server list table.
- To add presets (if driver is capable), one must click on the (setting icon) in the server list table
- To delete a server, one must click on the (trash icon) in the server list table.
By the time of writting this user manual (v 2.80), there are 3 drivers avalaible to use:
BigBlueButton
BigBlueButton or BBB is the most common driver. It provides more controll over every aspect of a meeting session, hence more of the functionalities this plugin offers are based on this VC system.

Driver options:
- Allow standard recordings: enables/disables default BBB recording feature. (disabled if opencast is selected)
- Use Opencast for recordings: enables/disables recording feature but in opencast. (disabled if default recording is selected)
- Enable configuration of recordings: This option enables the teachers to control the recording behavior of the session, e.g. Start it from the beginning etc.
- Start recording automatically by default: This option is intended to give a pre-defined value to Start recording automatically in add meeting dialog in a course.
- Allow automatically upload of materials: This option provides the feature for teachers, to upload any slides etc. to the meeting session via the add meeting dialog in a course.
- Welcome message: This works as a default welcome message for every BBB meeting, if teachers do not enter any welcome message in the setting, this default meesage will be used.
Server options:
Each BBB server provide some option, among them URL of the BBB server and API key (Salt) are required.
Following options are available:

- Active?: activates/deactivates the server
- Label : the label (name) of the server to be displayed to the users (teachers)
- URL of the BBB server: The BBB server url to connect to Required
- API key (Salt) : The BBB server API key AKA salt Required
- Access via Proxy: the proxy to be accessed from.
- Connection Timeout: As the name suggests
- Request Timeout: As the name suggests
- Max. number of participants: Applying this option, provides a max participants limit only to this server, that means, teachers on the other side can only set the max participants number up to this value.
- Course type: This option makes the server to be used only in the specified course type.
- Description: A simple text to describe and show some informations to the teacher in the meeting setting dialog when selecting this server.
Presets
Admin are able to add definable preset templates options for each servers, for teachers to choose from, by clicking on the (setting icon) in the server list table.
When a teacher selects any preset template, the room setting options will get their values from the preset template.

- Name: the name of the preset template Required
- Automatically consider number of participants: This option makes the preset to watch and match the meeting max. participants number with the min. participants number of the preset.
- Minimum number of participants: This option is the starting range of the max participants in room settings, that means this option is set to 20 the rooms with more than 20 could be considred to lie under this template.
- Deactivate shared notes: BBB specific feature (as name describes)
- Only moderators can share audio: BBB specific feature (as name describes)
- Only moderators can share webcams : BBB specific feature (as name describes)
- Only moderators can see webcams : BBB specific feature (as name describes)
- Mute all participants initially : BBB specific feature (as name describes)
DfnVc
This is the Adobe Connect VC system.

Driver options:
By the time of writting this user manual, there is no specific driver option for this driver.
Server options:
Each DfnVc server provide some option, among them API endpoint, Function ID and Password are required.

- Active?: activates/deactivates the server
- Label : the label (name) of the server to be displayed to the users (teachers)
- API endpoint: The DfnVc server url to connect to Required
- Function ID: The function ID of the server Required
- Password : API Password Required
- Course type: This option makes the server to be used only in the specified course type.
- Description: A simple text to describe and show some informations to the teacher in the meeting setting dialog when selecting this server.
MicrosoftTeams
The Microsoft Teams VC system driver.

Driver options:
By the time of writting this user manual, there is no specific driver option for this driver.
Server options:
Each DfnVc server provide some option, all of them are required.

- Microsoft Graph URL (Required)
- Application (client) ID (Required)
- Directory (tenant) ID (Required)
- Secret ID (value) (Required)
Manage default slides
This feature is intended to provide the advantage of manaing the default slides for each VC session (as of now only BBB is compatible).
This section is accessible via the view sidebar Manage default slide
Important: This feature only works if the General Config > Use Stud.IP for default slides is set to Yes

Fonts
In this section admin can upload the .ttf file to set the fonts of the default slides passed to the VC session.
The fonts installed here do not effect any part of the system, but only the default slides generated by this plugin passed to VC session as default slide.
The regular font is required and will play the main role for the font types, meaning if others missing, this one will be taken.

- Uploading is done via clicking on the (upload icon) in each table row. (only .ttf file type is acceptable)
- Deleting or uninstalling a font is done via clicking on the (trash icon) in each table row. (confirmation is needed)
Templates
By default there is no pre-defined empty template, therefore one should one add a new template via the Add template button.

After adding a template, a new empty template will be added and admin should then proceed with creating new template.
NOTE:
- Keep in mind that to avoid having a long and complicated lists, only the latest added template will be expanded others will be collapsed.
- One should only add new template if only the last template is configured. (At least the PDF file is uploaded)

PDF Slide
The PDF slide is the required part of a template.
- Uploading is done via clicking on the (upload icon) in PDF slide table row. (only .pdf file type is acceptable)
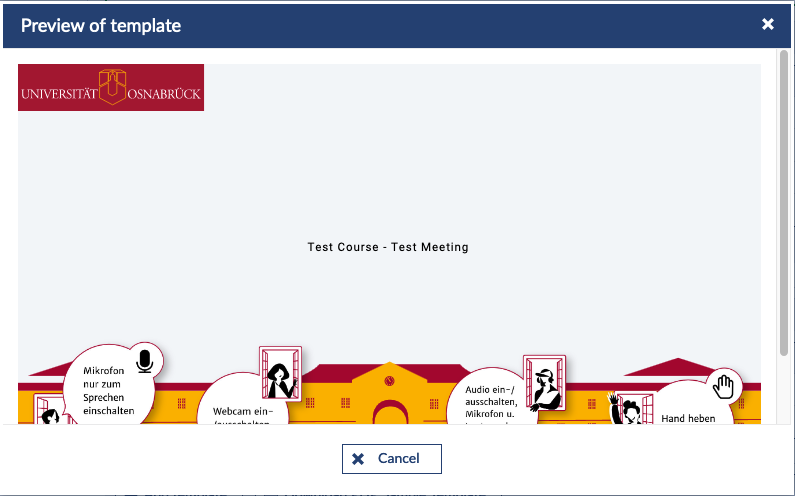
- Preview is done via clicking on the (pdf file icon) in PDF slide table row, with opens a dialog showing the current template that will be shown exactly the same in every meeting session.

- Deleting or uninstalling a pdf slide is done via clicking on the (trash icon) in PDF slide table row. (confirmation is needed)
-> NOTE: deleting a pdf slide means deleting the whole template.
PHP (HTML) Template
This is a php file written if the flexitemplate format used in Stud.IP that can provide not only the text to the pdf file but as it works as flexi_template it can also align the text and have dynamic values written into the pdf based on whatever variables defined in this file.
In order to get to know the syntax and have more information about this flexi template supported php file, one could download a sample file via Download PHP Sample Template

- Uploading is done via clicking on the (upload icon) in the PHP (HTML) template table row. (only .php file type is acceptable)
- Deleting or uninstalling a php template is done via clicking on the (trash icon) in PHP (HTML) template table row. (confirmation is needed)
< Meetings | Overview | Lecturers manual >
